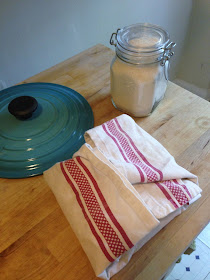
So I kind of feel like my friend Meghan requires no introduction, but that might be because she gets mentioned in this blog fairly regularly. This is her second stop around these parts as over a year ago she baked up a yummy strawberry balsamic tart. When she mentioned she was doing yeast experiments and made a no-knead bread, I suggested she do another guest post. Literally the conversation went like this...
Meghan: Did I tell you about my yeast experiments?
me: Noo what did you do?
Meghan: I made a loaf of no-knead bread in my Dutch oven and an overnight pizza dough
me: how did it go?
Meghan: Really well! The pizza dough was the smitten kitchen method. her cookbook has a quick dough and a slow dough, so smart
the bread was intimidating but it turned out perfectly
me: hmm You should make it again and do another guest post :)
Meghan: haha I can do that
So, this is Meghan's post. As a fellow food lover and home "chef," I know this bread really will turn out perfect. I might just have to get my yeast out for the long weekend and do a little yeast experimenting myself!
From Meghan:
My college roommate Emily makes bread and jams and all sorts of goodies for farmer's markets around Chicago. She loves her food to be hands-on, and I do too. I make my own granola, keep scraps of vegetables in my freezer to make soup stock, and almost always have a pot of dried beans soaking. But I had never tried to make bread at home. It seemed like a special and time-consuming skill.
Emily and Food52 both recommend Jim Leahy's no-knead bread for beginners, and I remembered it after my boyfriend got me a bright turquoise Le Creuset for Christmas. I had always been intimidated by using yeast, buying special flour and how hot your oven has to be, but once I got the idea in my head I had to try it.
Turns out it's fun and very satisfying. The whole process takes 15 hours, but you only have to pay attention for about 30 minutes. Bread flour and active dry yeast cost a lot less than one good loaf of bread. It makes good sandwiches and awesome French toast, and I've frozen half a loaf to eat later. It's a great food to reclaim from the grocery store. And baking makes your house smell amazing!
Key ingredient...bread flour
Measuring
Wet and dry meet yeast
Pre-rise
Hanging out in the dark overnight.
The first rise complete...look at those bubbles.
Things are a bit sticky.
Second rise
Ready for the oven
Into the pan and then lid on for the first 30 minutes.
No-Knead Dutch Oven Bread:
Makes 1 10" round loaf, 1 1/4 pounds
3 cups bread flour (400 grams)
1 ¼ teaspoon salt (8 grams)
¼ teaspoon instant or other active dry yeast (1 gram)
1 1/3 cup cool (55-65 degrees F) water (300 grams)
Cornmeal for dusting
1. You can measure with a kitchen scale if you have one, but I measure the old-fashioned way since I don’t. I use my biggest mixing bowl. Measure the flour by spooning it into a measuring cup and leveling off the cup with a knife (this fluffs the flour to keep it from packing in). Add the salt and yeast. Stir in the water until a tacky dough forms.
2. Cover the bowl with plastic wrap or a tea towel and put it in a dark corner of your kitchen for 12-18 hours. I’ve been measuring before I start making dinner and letting it sit overnight. It will double in size and be dotted with bubbles from the yeast coming to life.
3. Pull the stringy dough out onto a very well-floured surface and make a ball by pulling the edges toward the center. It’s all going to be very sticky, but you don’t need more than the flour on your surface and hands. Try not to overwork the dough. Dust a kitchen towel (don’t use terry cloth!) with lots of flour, place the dough seam-side-down in the center and wrap it up. Let it sit for an hour or so, then check the dough by pressing your finger into it - if it leaves an impression, it’s ready (if not, give it another 15 minutes).
4. In the last 15 minutes of the second rise, put your Dutch oven in and heat your oven to 475 degrees. When the dough is ready, carefully pull the Dutch oven out and dust the bottom with cornmeal. Invert the bread ball so the seam is up. Cover the pot and bake for 30 minutes, then remove the cover and bake another 8-10 minutes. It should be golden on top and your house should smell like heaven.
5. Cool thoroughly, at least an hour.
6. I store mine in a plastic bag, on the counter for the first few days, then in the refrigerator to beat any mold. Freezes well wrapped in a double layer of plastic inside a bag.


No comments:
Post a Comment